

Continuous Integration with Node, Semaphore, and Semantic-Release
When I sit down to code I never like thinking of the logistics of how the code will be released, how I’ll name my branches, what version the change being developed will become, and so on. After having played around with Jenkins a bit at work for continuous deployment, I decided it was time to sit down with my current personal project, action-runner, and automate as much of this as possible.
When looking for a continuous integration solution for this project, I had a few requirements in mind:
- The CI solution needs to be freely hosted for open source projects
- Tight integration into GitHub
- All pull requests to have to pass the build process
- The CI suite to be able to run tests automatically
- Changes to the master branch should publish to npm automatically
- Version controll will be handled automatically
After playing around with a few ideas, I found the best combination to be Semaphore for CI, and semantic-release for version bumping.
Setting up our repository
Note: If you already have a project setup or are familiar with setting up a simple node project, feel free to skip this section
To get started, we’ll create a new, empty repository on github:
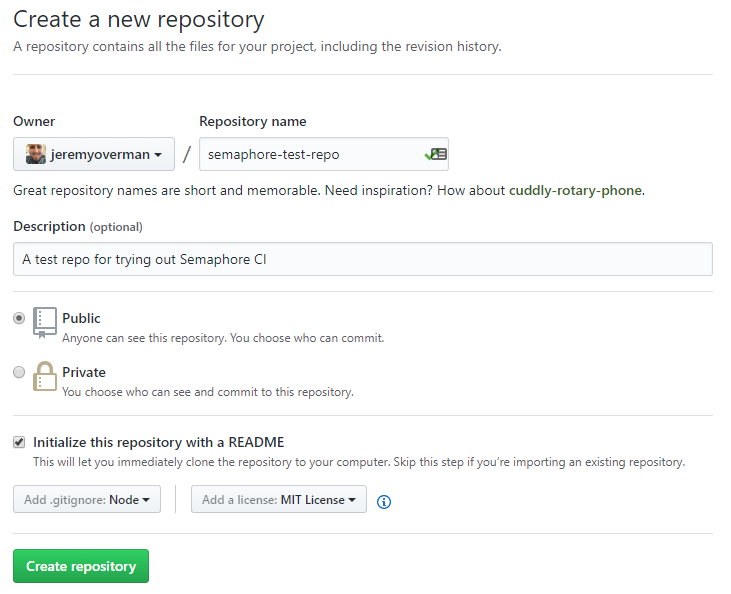
Now that we have our github repo set up, let’s clone it down, get it initialized, install some needed packages, and make a simple script.
git clone https://github.com/jeremyoverman/semaphore-test-repo.git
cd semaphore-test-repo
npm init
npm npm install --save-dev typescript jasmine @types/jasmine
To keep our master branch clean, we can create a new branch for our changes.
git checkout -b setting-up-the-project
Here we’ve initialized the NPM repository and installed typescript and jasmine. We’ll make our script in typescript, and test that it works using jasmine.
Now, let’s make our first script:
// src/index.ts

export function add (a: number, b: number) {
    return a + b;
}
Setting up TypeScript
In order to run this script, we will need to compile it with tsc. We can specify the compiler options with tsconfig.json in our root directory:
// /tscconfig.json

{
    "compilerOptions": {
        "target": "es5",
        "module": "commonjs",
        "outDir": "./dist",
        "strict": true
    },
    "include": [
        "src/**/*.ts"
    ]
}
We can now run tsc and it will compile all of our typescript files in src/ into javascript files in dist/ for us.
Setting up Jasmine
Now that we have a script let’s get some testing set up. We’ll use jasmine for our tests, though of course you can use whatever framework you want for yours.
Let’s set up our directory structure and create us a configuration file:
// src/spec/support/jasmine.json

{
  "spec_dir": "dist/spec",
  "spec_files": [
    "**/*[sS]pec.js"
  ],
  "helpers": [
    "helpers/**/*.js"
  ],
  "stopSpecOnExpectationFailure": false,
  "random": false
}
Now that that’s set up, we can go ahead and create our first spec file. We’ll save this under src/spec/index.spec.ts.
// /src/spec/index.spec.ts
import * as index from '../index';

describe('the index.ts module', () => {
    describe('the add function', () => {
        it('should add two numbers together', () => {
            let sum = index.add(4, 5);
            expect(sum).toBe(9);
        });
    });
});
To run our tests, we can use the command
node node_modules\jasmine\bin\jasmine.js --config=src/spec/support/jasmine.json
Notice here that since we didn’t install jasmine globally, we had to point to the jasmine script ourselves to run it. This helps keep separate projects isolated that may use different versions of packages. This is a lot to type out though, so we can add a script to our package.json to make our lives a bit easier.
// /package.json
  "scripts": {
    "test": "node node_modules/jasmine/bin/jasmine.js --config=src/spec/support/jasmine.json"
  },
Now all we have to do is run npm test to test our project.
C:\git\semaphore-test-repo>npm test

> semaphore-test-repo@1.0.0 test C:\git\semaphore-test-repo
> node node_modules/jasmine/bin/jasmine.js --config=src/spec/support/jasmine.json

Started
.


1 spec, 0 failures
Finished in 0.009 seconds
Push up our changes
It’s time to save our changes and push them up to our GitHub repo.
git add .
git commit -m "Set up typescript and jasmine, and made our first script"
git push

Once our pull request to master is complete, we should get this message letting us know that GitHub has checked that there are no conflicts with the master branch:
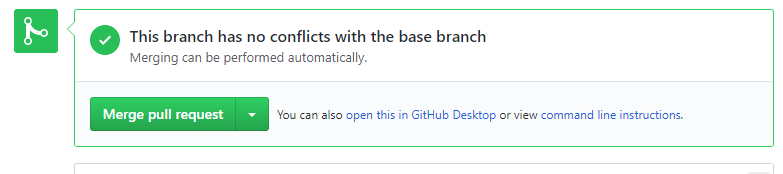
We can now see how semaphore can perform more checking for us. Let’s go ahead and merge this pull request into master.
Time for Semaphore
It’s time to head on over to the Semaphore marketplace site and install Semaphore. You’re able to get a Semaphore account for free for open source and small private repositories.
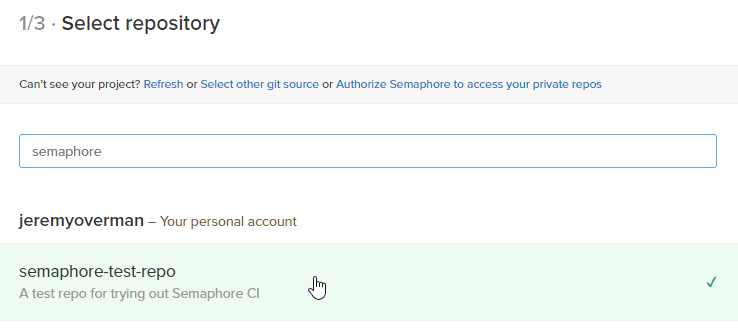
Repository Connection
Once installed, you will be prompted to select a GitHub repository work with. We can go ahead and add our semaphore-test-repo here.
Next, we need to select a base branch. This will be the initial branch that semaphore builds. This will normally be your master branch.
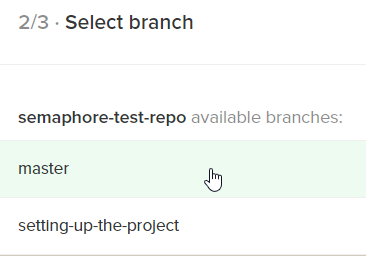
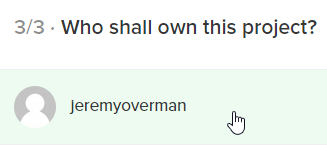
Lastly, you must select the owner of the semaphore instance for this repo.
Build Setup
This is where things start to get fun. Here we can specify how we want to build our project every time a branch changes, and every time a pull request is submitted. We can specify things such as how to install our dependencies, compile our code, and even test our code.
By default, you’ll get something that looks like this:
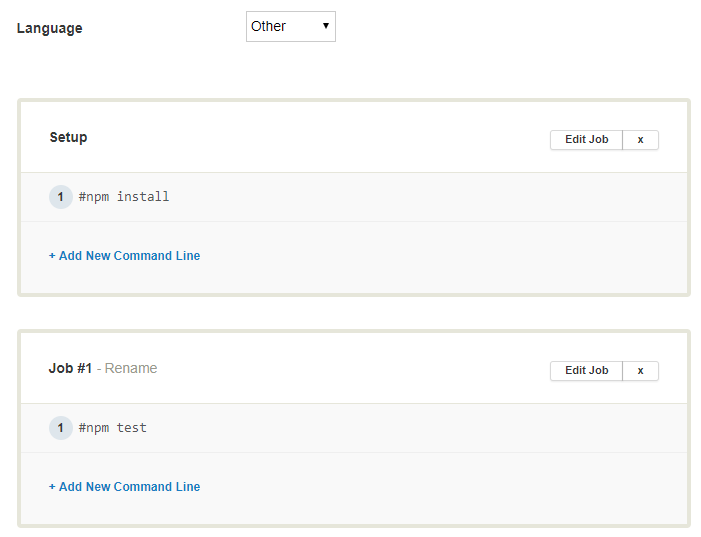
We can change our Language to JavaScript, which will give us a new option to chose the node version we want to build against. We’ll want to use the latest version (this will be important for semantic-release later).
The job boxes are where we can enter commands that are run on every build. Keep in mind that by default these containers are running on Ubuntu boxes, and the current working dirctory is the root of your repository on this machine.
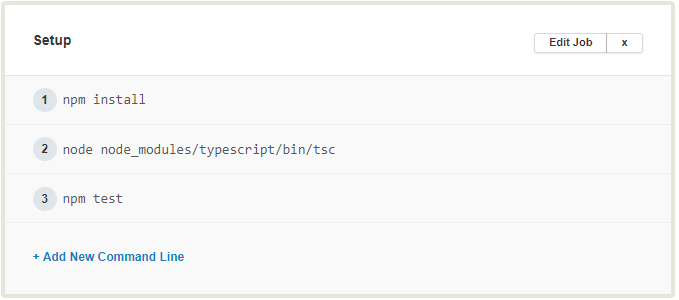
For our purposes, we only need one job running in parallel, so we can delete the second job. We can edit the Setup job to look like this:
npm install
node node_modules/typescript/bin/tsc
npm test
This will run each command, one line after another, on every build, and stop anywhere in the middle if a command fails.
Now at the bottom, we can test our build out by pressing “Build With These Settings.”
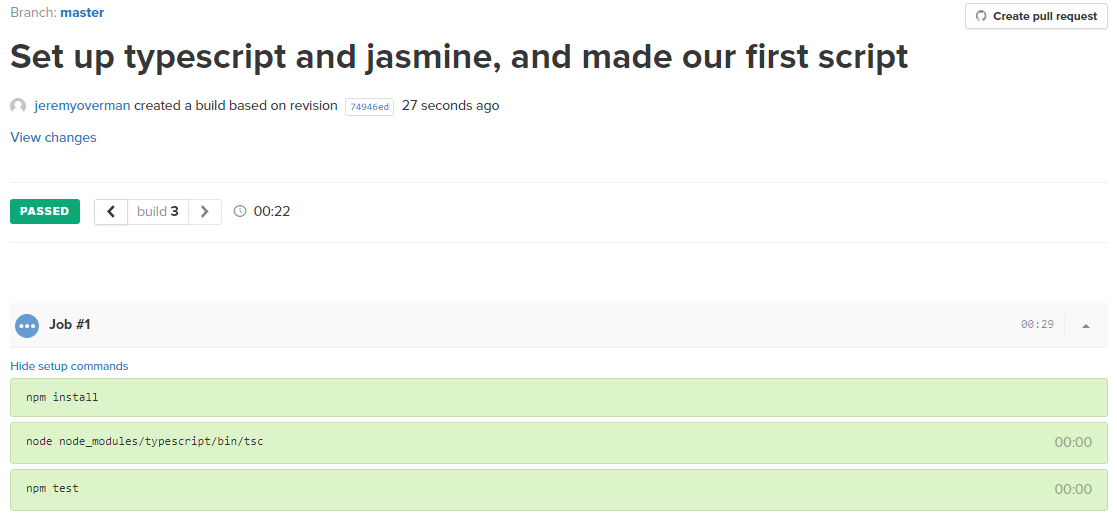
Success! Now, anytime a new pull request is made against master, Semaphore will automatically kick off a build, and let you know if your branch passes or not.
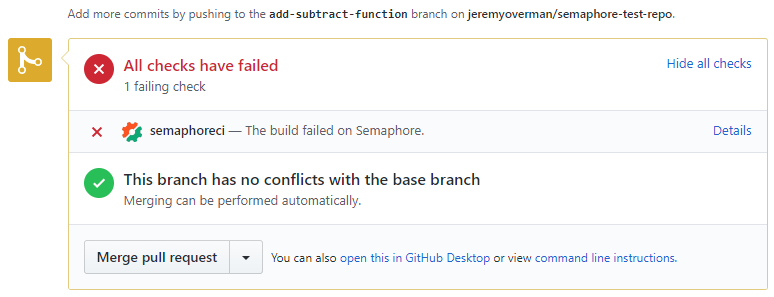
We can see now on a pull request, semaphore will give us a nice view of whether the build passes or not.
Semantic-Release
Semantic-release is a wonderful package. The project’s readme does a great job explaining what it’s all about:
Instead of writing meaningless commit messages, we can take our time to think about the changes in the codebase and write them down. Following formalized conventions it is then possible to generate a helpful changelog and to derive the next semantic version number from them.
When semantic-release is set up it will do that after every successful continuous integration build of your master branch (or any other branch you specify) and publish the new version for you. This way no human is directly involved in the release process and your releases are guaranteed to be unromantic and unsentimental.
Semantic version will let us name our commits something meaningful, determine how our package versions should be updated, we can then publish to npm, then it will create a GitHub release for us!
Without further ado, let’s get started.
npm install --save-dev semantic-release
Semantic-release apparently works well out of the box for TravisCI, but there’s some extra setup required for us to use it with Semaphore. To get us started, we must specify a verifyConditions script to override the deafult one. This script will check that we’re running on a CI server before actually writing changes which helps us debug things locally.
We need to add the following to package.json:
// /package.json
"release": {
  "verifyConditions": {
    "path": "./verifyConditions.js"
  }
}
Then, of course we need to create our verifyConditions.js script:
// /verifyConditions.js
const SRError = require('@semantic-release/error');

module.exports = function (pluginConfig, config, callback) {
    if (config.env.SEMAPHORE === 'true') {
        callback(null);
    } else {
        callback(new SRError('Not running on Semaphore, won\'t be published.'));
    }
}
This will look at the environment properties on the computer and see if we’re currently running on our Semaphore instance. If so, it’ll write changes to file and update our GitHub repo, otherwise, it’ll only print debug messages for us.
Now we can commit using:
git add .
git commit -m "feat: added semantic-release and did some setup"
Notice the “feat” at the beginning of the commit message. This tells semantic release that this commit is a new feature being added. By deafult, semantic-release will understand this to mean that it needs to bump the minor version of the package (remember, semantic versioning uses “Major.Minor.Patch” notation).
Now we can test out semantic-release by running the pre command:
C:\git\semaphore-test-repo>node node_modules\semantic-release\bin\semantic-release.js pre
semantic-release WARN pre Not running on Semaphore, won't be published.
semantic-release ERR! pre Determined version 1.0.0 as "latest". Not publishing in debug mode. { type: 'initial', version: '1.0.0' }
Since this is our initial version, the version will stick to 1.0.0 for now. We can also see that it only printed a debug message since we’re running this locally on our computer. We can go ahead and push master up to the repo now and get started on the Semaphore side of deployment.
Deploying in Semaphore
If you head back to your Semaphore dashboard, you’ll notice a “Set Up Deployment” button above your project timeline. This will allow you to set up a deployment script that runs automatically when the master branch changes, but only after it builds successfully. This is where we will run semantic-release and push our NPM package.
Once you hit the button, it’ll ask you where you want to deploy your project. Of course this depends on where you want your project hosted but, since this is just an NPM project, we can just do Generic Deployment:

We can now select Automatic, so on a successful build of master, a new deployment is made for us.

And of course, we’ll select our master branch for deployment.
For the deployment commands, we can do this:
node node_modules/semantic-release/bin/semantic-release.js pre
npm publish
node node_modules/semantic-release/bin/semantic-release.js post
This tells semantic release to run it’s pre actions (bump the package version), publish the package, then run it’s post actions (create git tags, a release, etc.) for us.
On the next screen, since we won’t be deploying to an actual server, there’s no need to add a private SSH key, so we can just skip this step.
Now, you just need to give your deployment a name (it’ll be listed as “Server name” in this wizard), and your basic configuration is complete!
Setting up deployment environment
Now if you hit the Deploy button, you’ll notice your deployment will fail. There are some extra steps we need to take to get npm and git authenticated.
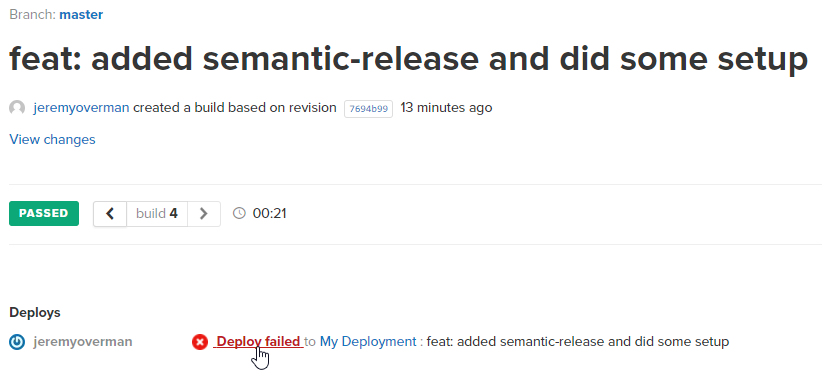
semantic-release ERR! init No github token specified. ENOGHTOKEN
semantic-release ERR! init No npm token specified. ENONPMTOKEN
Generate a GitHub API token
First things first, we’ll need to go to our GitHub account settings and create a unique token for semantic-release to update with.
Once there, select “Generate New Token.” This will give you a page requesting a description and the scope of the permissions the token will allow.
You’ll want:
- repo
- read:org
- user:email
- write:repo_hook
When you hit generate key, a new key will be generated for you. Store this key somewhere safe (never in your repo). GitHub will never tell you the key again, though you can always generate a new one if need be.
Get your NPM login token
We’ll need to get your NPM login token so we can publish our package. First, open up a terminal and run npm login:
C:\git\semaphore-test-repo>npm login
Username: jeremyoverman
Password:
Email: (this IS public) jeremyoverman@gmail.com
Logged in as jeremyoverman on https://registry.npmjs.org/.
Now that you’re logged in open up your .npmrc file in your home directory. On Linux, this should be in ~/.npmrc, and on windows you’ll find it in %USERPROFILE%\.npmrc.
In this file you’ll see something like this:
//registry.npmjs.org/:_authToken=xxxxxxxx-xxxx-xxxx-xxxx-xxxxxxxxxxxx
You’ll want to copy the authToken to use in the next step (everything after the =).
Set up tokens on deployment server
Let’s head back to Semaphore and go to your Project Settings. In here, there will be a tab for setting Environment Variables.
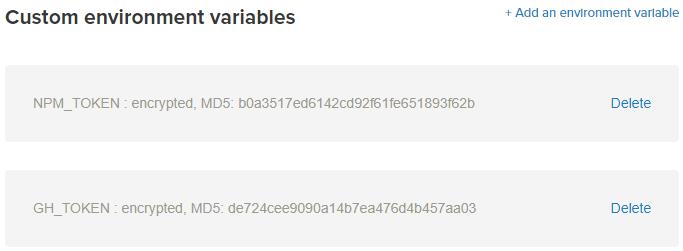
The first variable we’ll set up is GH_TOKEN:
- Name: GH_TOKEN
- Content: The GitHub token you copied earlier
- Encrypt Content: Checked
Next you’ll add NPM_TOKEN:
- Name:
NPM_TOKEN - Content: The NPM token you copied earlier (xxxxxxxx-xxxx-xxxx-xxxx-xxxxxxxxxxxx)
- Encrypt Content: Checked
Your environment variables sould now look something like this:
Now if we go back to our dashboard and click the “Failed” label on our failed deployment, we can try the deployment again.
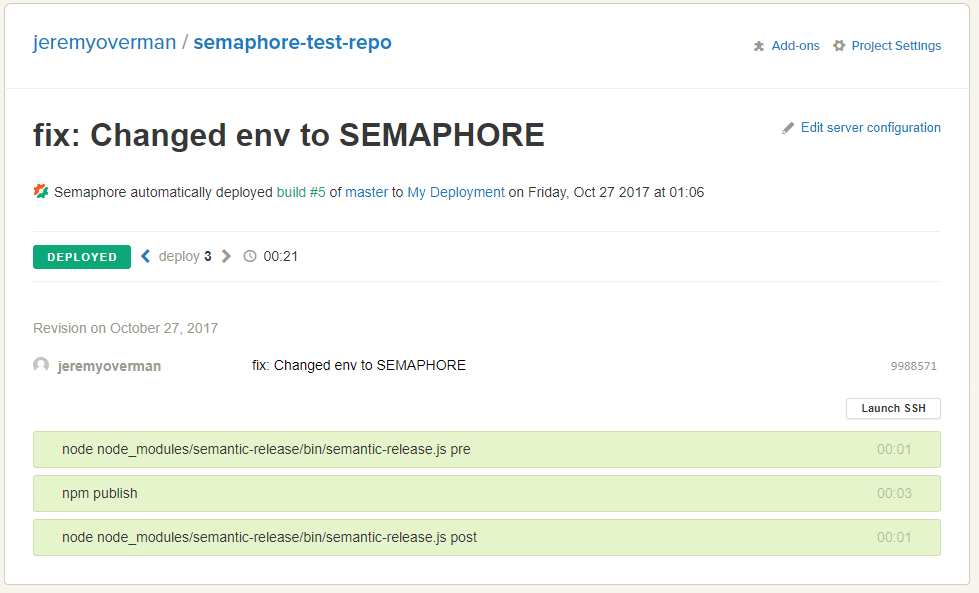
We’re now successfully deployed! We can now see our package is updated in the NPMJS registry:
C:\git\semaphore-test-repo>npm search semaphore-test-repo
NAME                      | DESCRIPTION          | AUTHOR          | DATE       | VERSION  | KEYWORDS
semaphore-test-repo       | A test repo for…     | =jeremyoverman  | 2017-10-27 | 1.0.0    |
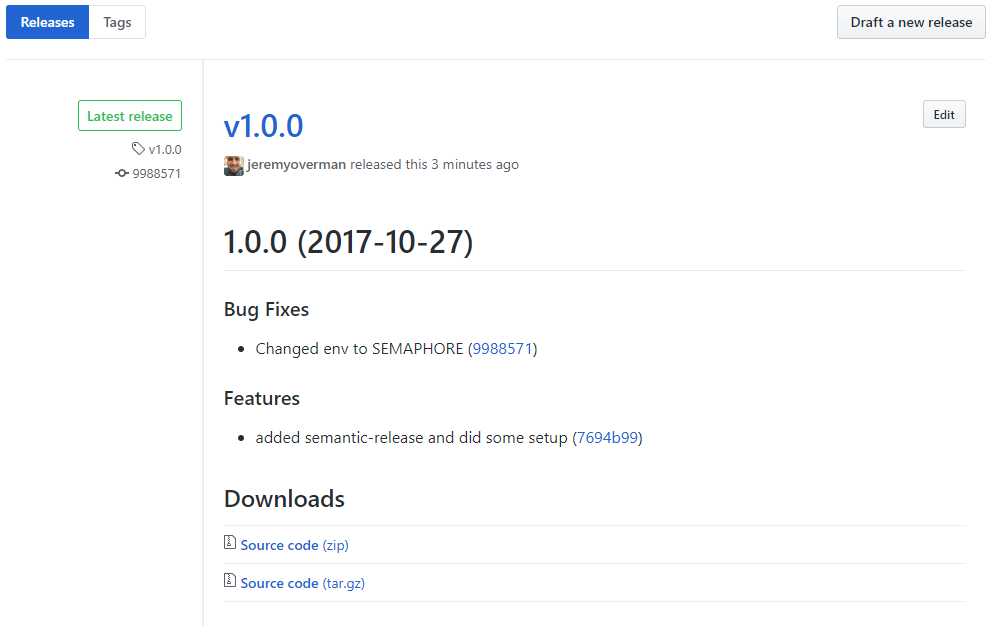
And semantic-release even added a release tag and created a release on GitHub for us:
Closing
With our setup, we now have a fully automated build and deployment process for our NPM package. This is one less thing we have to worry about managing while developing our application, and we can focus on the important things.
There’s plenty more you can do with Semaphore and semantic-release that I didn’t cover in this artical. Please play around with the applications and let me know what cool things you’ve done with them in the comments!